

schrauber
-
Content Count
68 -
Joined
-
Last visited
Content Type
Profiles
Forums
Calendar
Posts posted by schrauber
-
-
The file should be gone now.
Please update your version of Malwarebytes and run a quick scan, post back with the content of the logfile.
-
Hi,
- Download The Avenger by Swandog46 from here.
- Unzip/extract it to a folder on your desktop.
- Double click on avenger.exe to run The Avenger.
- Click OK.
- Make sure that the box next to Scan for rootkits has a tick in it and that the box next to Automatically disable any rootkits found does not have a tick in it.
- Copy all of the text in the below code box to the clipboard by highlighting it and then pressing Ctrl+C.
Folders to delete:
C:\Recycler - In the avenger window, click the Paste Script from Clipboard,
 button.
 - Click the Execute button.
- You will be asked Are you sure you want to execute the current script?.
- Click Yes.
- You will now be asked First step completed --- The Avenger has been successfully set up to run on next boot. Reboot now?.
- Click Yes.
- Your PC will now be rebooted.
- Note: If the above script contains Drivers to delete: or Drivers to disable:, then The Avenger will require two reboots to complete its operation.
- After your PC has completed the necessary reboots, a log should automatically open. If it does not automatically open, then the log can be found at %systemdrive%\avenger.txt (typically C:\avenger.txt).
- Please post this log
Please update your version of Malwarebytes and run a quick scan, post back with the content of the logfile.
- Download The Avenger by Swandog46 from here.
-
Hi,
Run OTL
- Under the Custom Scans/Fixes box at the bottom, paste in the following
:OTL
O2 - BHO: (DownloadRedirect Class) - {00000000-6CB0-410C-8C3D-8FA8D2011D0A} - Reg Error: Value error. File not found
O2 - BHO: (no name) - {95C59A11-5544-4705-8E55-E6DE0387EBAA} - C:\WINDOWS\System32\adsmsex.dll File not found
O3 - HKCU\..\Toolbar\ShellBrowser: (no name) - {42CDD1BF-3FFB-4238-8AD1-7859DF00B1D6} - No CLSID value found.
O3 - HKCU\..\Toolbar\WebBrowser: (no name) - {0B53EAC3-8D69-4B9E-9B19-A37C9A5676A7} - No CLSID value found.
O3 - HKCU\..\Toolbar\WebBrowser: (no name) - {42CDD1BF-3FFB-4238-8AD1-7859DF00B1D6} - No CLSID value found.
O3 - HKCU\..\Toolbar\WebBrowser: (no name) - {4982D40A-C53B-4615-B15B-B5B5E98D167C} - No CLSID value found.
[2007/09/22 14:45:51 | 00,097,280 | ---- | C] () -- C:\WINDOWS\System32\dpwsoc.dll
:Commands
[emptytemp] - Then click the Run Fix button at the top
- Let the program run unhindered, when done it will say "Fix Complete press ok to open the log"
- Please post that log in your next reply. Note: If a file or folder cannot be moved immediately you may be asked to reboot the machine to finish the move process. If you are asked to reboot the machine choose Yes. In this case, after the reboot, open Notepad (Start->All Programs->Accessories->Notepad), click File->Open, in the File Name box enter *.log and press the Enter key, navigate to the C:\_OTL\MovedFiles folder, and open the newest .log file present, and copy/paste the contents of that document back here in your next post.
================================Follow up scan=================================
- Double click on OTL to run it. Make sure all other windows are closed and to let it run uninterrupted.
- When the window appears, underneath Output at the top change it to Minimal Output.
- Under the Standard Registry box change it to All.
- Click the Run Scan button. Do not change any settings unless otherwise told to do so. The scan wont take long.
- When the scan completes, it will open one notepad window. OTL.Txt a This is saved in the same location as OTL.
- Please copy (Edit->Select All, Edit->Copy) the contents of this file and post it with your next reply.
- Under the Custom Scans/Fixes box at the bottom, paste in the following
-
Hm, let's have a look into a fresh OTL logfile. I think you get reinfected from the recycle bin.
-
How is your system running right now?
Please post back with a fresh OTL logfile.
-
Hi,
1. Close any open browsers.
2. Close/disable all anti virus and anti malware programs so they do not interfere with the running of ComboFix.
3. Open notepad and copy/paste the text in the quotebox below into it:
File::
c:\windows\system32\drivers\hslorztm.dat
Driver::
iufuwwhs
Save this as CFScript.txt, in the same location as ComboFix.exe

Refering to the picture above, drag CFScript into ComboFix.exe
When finished, it shall produce a log for you at C:\ComboFix.txt which I will require in your next reply.
-
Inactive topic...
If you still need help on this problem, contact me or one of the Moderators to re-open this up.
Topic closed.
-
Inactive topic...
If you still need help on this problem, contact me or one of the Moderators to re-open this up.
Topic closed.
-
Hello, a.p.barron
Welcome to the BestTechie Forums. My name is Thomas (Tom is fine), and I will be helping you fixing your problems.
Please take note of some guidelines for this fix:
- Refrain from making any changes to your computer including installing/uninstall programs, deleting files, modifying the registry, and running scanners or tools. Doing so could cause changes to the directions I have to give you and prolong the time required. Further more, you should not be taking any advice relating to this computer from any other source throughout the course of this fix.
- If you do not understand any step(s) provided, please do not hesitate to ask before continuing. I would much rather clarify instructions or explain them differently than have something important broken.
- Even if things appear to be better, it might not mean we are finished. Please continue to follow my instructions and reply back until I give you the "all clean". We do not want to clean you part-way, only to have the system re-infect itself.
- Do not start a new topic. The logs that you post should be pasted directly into the reply. Only attach them if requested or if they do not fit into the post.
- Please set your system to show all files.
Click Start, open My Computer, select the Tools menu and click Folder Options.
Select the View Tab. Under the Hidden files and folders heading, select Show hidden files and folders.
Uncheck: Hide file extensions for known file types
Uncheck the Hide protected operating system files (recommended) option.
Click Yes to confirm.
Download Combofix from any of the links below but rename it to <schrauber> before saving it to your desktop.
--------------------------------------------------------------------
Double click on the renamed Combofix.exe & follow the prompts.
- When finished, it will produce a report for you.
- As part of it's process, ComboFix will check to see if the Microsoft Windows Recovery Console is installed. With malware infections being as they are today, it's strongly recommended to have this pre-installed on your machine before doing any malware removal. It will allow you to boot up into a special recovery/repair mode that will allow us to more easily help you should your computer have a problem after an attempted removal of malware.
- Follow the prompts to allow ComboFix to download and install the Microsoft Windows Recovery Console, and when prompted, agree to the End-User License Agreement to install the Microsoft Windows Recovery Console.
**Please note: If the Microsoft Windows Recovery Console is already installed, ComboFix will continue it's malware removal procedures.

Once the Microsoft Windows Recovery Console is installed using ComboFix, you should see the following message:
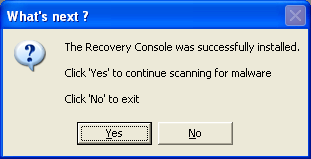
Click on Yes, to continue scanning for malware.
When finished, it will produce a log for you. Please include the C:\ComboFix.txt in your next reply.
This tool is not a toy and not for everyday use.
ComboFix SHOULD NOT be used unless requested by a forum helper
If you need help, see this link:
http://www.bleepingcomputer.com/combofix/how-to-use-combofix
- Refrain from making any changes to your computer including installing/uninstall programs, deleting files, modifying the registry, and running scanners or tools. Doing so could cause changes to the directions I have to give you and prolong the time required. Further more, you should not be taking any advice relating to this computer from any other source throughout the course of this fix.
-
Please uninstall Firefox again, reboot, install a fresh downloaded version of Firefox and try it without any extension installed.
-
Òk, please test the system a few days and let me know

-
Hi,
How is your system running?
-
Hi,
Run OTL
- Under the Custom Scans/Fixes box at the bottom, paste in the following
:files
C:\WINDOWS\Downloaded Program Files\vzbb.dll
c:\recycler - Then click the Run Fix button at the top
- Let the program run unhindered, when done it will say "Fix Complete press ok to open the log"
- Please post that log in your next reply. Note: If a file or folder cannot be moved immediately you may be asked to reboot the machine to finish the move process. If you are asked to reboot the machine choose Yes. In this case, after the reboot, open Notepad (Start->All Programs->Accessories->Notepad), click File->Open, in the File Name box enter *.log and press the Enter key, navigate to the C:\_OTL\MovedFiles folder, and open the newest .log file present, and copy/paste the contents of that document back here in your next post.
================================Follow up scan=================================
- Double click on OTL to run it. Make sure all other windows are closed and to let it run uninterrupted.
- When the window appears, underneath Output at the top change it to Minimal Output.
- Under the Standard Registry box change it to All.
- Click the Run Scan button. Do not change any settings unless otherwise told to do so. The scan wont take long.
- When the scan completes, it will open one notepad window. OTL.Txt a This is saved in the same location as OTL.
- Please copy (Edit->Select All, Edit->Copy) the contents of this file and post it with your next reply.
- Under the Custom Scans/Fixes box at the bottom, paste in the following
-
Hi and welcome to BestTechie! I'll be assisting you to clean up your computer. The first thing I need you to do is follow the steps in this thread. Make sure you go through all of the procedures, and post back here with the logs you get back.
-
Ok, how is your system running?
-
The logfiles looking good. Let's run an onlinescan to check for some leftovers.
Please run a BitDefender Online Scan
- Click I Agree to agree to the EULA.
- Allow the ActiveX control to install when prompted.
- Click Click here to scan to begin the scan.
- Please refrain from using the computer until the scan is finished. This might take a while to run, but it is important that nothing else is running while you scan.
- When the scan is finished, click on Click here to export the scan results.
- Save the report to your desktop so you can post it in your next reply.
- Click I Agree to agree to the EULA.
-
Hi,
How is your system running?
-
Hi,
This problem is only in Firefox? Can you surf with Internet Explorer normally?
-
You're welcome
Since this issue appears to be resolved ... this Topic has been closed.
If you're the topic starter, and need this topic reopened, please contact a staff member with the address of the thread.
Everyone else please begin a New Topic.
-
Hi and welcome to BestTechie! I'll be assisting you to clean up your computer. The first thing I need you to do is follow the steps in this thread. Make sure you go through all of the procedures, and post back here with the logs you get back.
-
Hi,
Please download Malwarebytes Anti-Malware and save it to your desktop.
MBAM may "make changes to your registry" as part of its disinfection routine. If using other security programs that detect registry changes (ie Spybot's Teatimer), they may interfere or alert you. Temporarily disable such programs or permit them to allow the changes.
- Make sure you are connected to the Internet.
- Double-click on mbam-setup.exe to install the application.
- When the installation begins, follow the prompts and do not make any changes to default settings.
- When installation has finished, make sure you leave both of these checked:
- Update Malwarebytes' Anti-Malware
- Launch Malwarebytes' Anti-Malware
[*]Then click Finish.
- Update Malwarebytes' Anti-Malware
MBAM will automatically start and you will be asked to update the program before performing a scan.
- If an update is found, the program will automatically update itself. Press the OK button to close that box and continue.
- If you encounter any problems while downloading the definition updates, manually download them from here and just double-click on mbam-rules.exe to install.
On the Scanner tab:
- Make sure the "Perform Quick Scan" option is selected.
- Then click on the Scan button.
- If asked to select the drives to scan, leave all the drives selected and click on the Start Scan button.
- The scan will begin and "Scan in progress" will show at the top. It may take some time to complete so please be patient.
- When the scan is finished, a message box will say "The scan completed successfully. Click 'Show Results' to display all objects found".
- Click OK to close the message box and continue with the removal process.
Back at the main Scanner screen:
- Click on the Show Results button to see a list of any malware that was found.
- Make sure that everything is checked, and click Remove Selected.
- When removal is completed, a log report will open in Notepad.
- The log is automatically saved and can be viewed by clicking the Logs tab in MBAM.
- Copy and paste the contents of that report in your next reply. Be sure to post the complete log to include the top portion which shows MBAM's database version and your operating system.
- Exit MBAM when done.
Note: If MBAM encounters a file that is difficult to remove, you will be asked to reboot your computer so MBAM can proceed with the disinfection process. If asked to restart the computer, please do so immediately. Failure to reboot normally (not into safe mode) will prevent MBAM from removing all the malware.
Also please post back with a fresh OTL logfile.
- Make sure you are connected to the Internet.
-
Please post back with a fresh OTL logfile.
-
Hi,
Viewpoint Manager is considered as foistware instead of malware since it is installed without users approval but doesn't spy or do anything "bad". This changed from what we know in 2006 read this article:
http://www.clickz.com/news/article.php/3561546
I suggest you remove the program now. Click on start > run > and then paste the following into the "open" field: appwiz.cpl and press OK. From within Add or Remove Programs uninstall the following if they exist: Viewpoint, Viewpoint Manager, Viewpoint Media Player.
Step 1
Click "start" on the taskbar and then click on the "Control Panel" icon.
Please doubleclick the "Add or Remove Programs" icon
A list of programs installed will be "populated" this may take a bit of time.
If they exist, uninstall the following by clicking on the following entries and selecting "remove":
J2SE Runtime Environment 5.0 Update 6
J2SE Runtime Environment 5.0 Update 9
J2SE Runtime Environment 5.0 Update 10
Java™ SE Runtime Environment 6 Update 1
Java™ 6 Update 2
Java™ 6 Update 3
Java™ 6 Update 5
Java™ 6 Update 7
Step 2
Run OTL
- Under the Custom Scans/Fixes box at the bottom, paste in the following
:commands
[emptytemp]
[resethosts] - Then click the Run Fix button at the top
- Let the program run unhindered, when done it will say "Fix Complete press ok to open the log"
- Please post that log in your next reply. Note: If a file or folder cannot be moved immediately you may be asked to reboot the machine to finish the move process. If you are asked to reboot the machine choose Yes. In this case, after the reboot, open Notepad (Start->All Programs->Accessories->Notepad), click File->Open, in the File Name box enter *.log and press the Enter key, navigate to the C:\_OTL\MovedFiles folder, and open the newest .log file present, and copy/paste the contents of that document back here in your next post.
================================Follow up scan=================================
- Double click on OTL to run it. Make sure all other windows are closed and to let it run uninterrupted.
- When the window appears, underneath Output at the top change it to Minimal Output.
- Under the Standard Registry box change it to All.
- Click the Run Scan button. Do not change any settings unless otherwise told to do so. The scan wont take long.
- When the scan completes, it will open one notepad window. OTL.Txt a This is saved in the same location as OTL.
- Please copy (Edit->Select All, Edit->Copy) the contents of this file and post it with your next reply.
Step 3
Please update your version of Malwarebytes and run a quick scan, post back with the content of the logfile.
Step 4
Please run a BitDefender Online Scan
- Click I Agree to agree to the EULA.
- Allow the ActiveX control to install when prompted.
- Click Click here to scan to begin the scan.
- Please refrain from using the computer until the scan is finished. This might take a while to run, but it is important that nothing else is running while you scan.
- When the scan is finished, click on Click here to export the scan results.
- Save the report to your desktop so you can post it in your next reply.
- Under the Custom Scans/Fixes box at the bottom, paste in the following
-
Hi,
Please download GMER from one of the following locations and save it to your desktop:
- Main Mirror
This version will download a randomly named file (Recommended) - Zipped Mirror
This version will download a zip file you will need to extract first. If you use this mirror, please extract the zip file to your desktop.
- Disconnect from the Internet and close all running programs.
- Temporarily disable any real-time active protection so your security programs will not conflict with gmer's driver.
- Double-click on the randomly named GMER file (i.e. n7gmo46c.exe) and allow the gmer.sys driver to load if asked.
- Note: If you downloaded the zipped version, extract the file to its own folder such as C:\gmer and then double-click on gmer.exe.

- GMER will open to the Rootkit/Malware tab and perform an automatic quick scan when first run. (do not use the computer while the scan is in progress)
- If you receive a WARNING!!! about rootkit activity and are asked to fully scan your system...click NO.
- Now click the Scan button. If you see a rootkit warning window, click OK.
- When the scan is finished, click the Save... button to save the scan results to your Desktop. Save the file as gmer.log.
- Click the Copy button and paste the results into your next reply.
- Exit GMER and re-enable all active protection when done.
- Main Mirror
I Need Some Help :([RESOLVED]
in Malware Removal
Posted
Lets run an onlinescan to check for some leftovers
I'd like us to scan your machine with ESET OnlineScan
ESET OnlineScan
[*]Check
[*]Click the button.
[*]Accept any security warnings from your browser.
[*]Check
[*]Push the Start button.
[*]ESET will then download updates for itself, install itself, and begin scanning your computer. Please be patient as this can take some time.
[*]When the scan completes, push
[*]Push , and save the file to your desktop using a unique name, such as ESETScan. Include the contents of this report in your next reply.
[*]Push the button.
[*]Push
A log file will be saved here: C:\Program Files\ESET\ESET Online Scanner\log.txt